The Science of Pressure Cookers
October 21, 2017
This is an excerpt from Cooking For Geeks, Second Edition, reprinted with permission.
Get your copy today on Amazon.
Pressure cookers are like an old-fashioned version of the microwave: a convenient appliance that speeds up cooking. Our grandparents used a manual version, essentially fancy pots with locking lids that went on the stovetop. Manual versions are still available today—now enhanced with safety locks and over-pressure release valves to prevent accidents—and are a worthwhile investment for the serious pressure cooker enthusiast. Manufacturers also make electric units, which can safely be left unattended and are what I suggest for first-time buyers. If you have a tiny kitchen, get an electric unit that has modes for slow cooking and cooking rice.
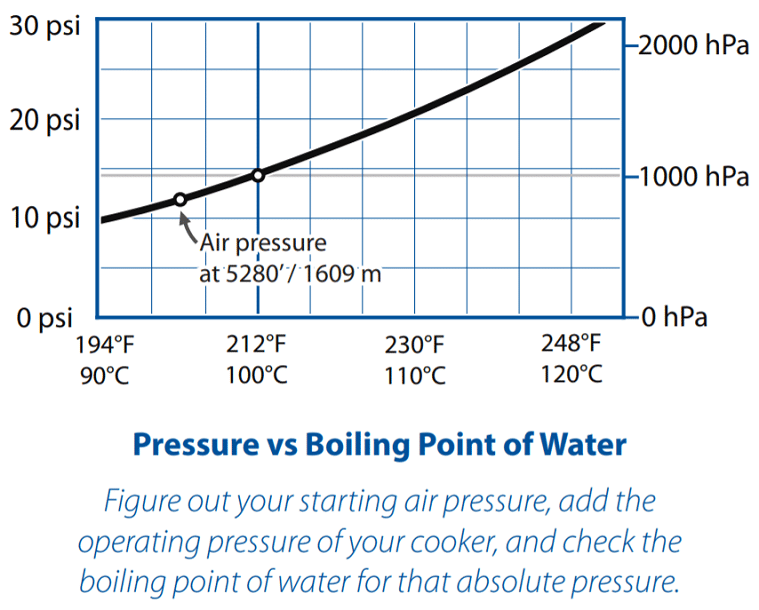
It’s not the pressure itself that changes how foods cook, but the impact of pressure on physical and chemical processes. Increasing pressure always increases the boiling point of water. In wet cooking methods, the temperature differential between the food and the liquid heating it is what determines how quickly the food heats up. Increasing the pressure increases the boiling point of water, but it’s not boiling water per se that does the cooking—it’s the larger temperature difference between the higher- temperature liquid and colder food that results in a faster rate of heat transfer.
How much faster heat will transfer into food depends on the maximum temperature at which the liquid can boil. Depending on the make and model, a pressure cooker can increase the pressure by 11–15 psi (758–1,034 hPa). There’s no formal standard for how much pressure a cooker should operate at, but most recipes are written assuming a high pressure of 15 psi (1,034 hPa) and low pressure of 8 psi (550 hPa). (Underwriters Laboratories won’t certify units above 15 psi, which is why you don’t see higher pressures than that.) You will need to adjust cooking times based on the pressure at which your model operates!
Pressure increases are relative to your current atmospheric pressure, so the maximum boiling point of water is based on your current air pressure plus the additional pressure your unit adds to it. If you live at sea level and have a higher-pressure unit, you’ll be able to get water up to 29.7 psi (2,048 hPa) for a boiling point of 250°F / 121°C, but a mile up and with a unit that only adds 11 psi (758 hPa), you’ll only raise the boiling point to 236°F / 113°C. Take a look at this zoomed-in part of the phase diagram of water from the previous section, cropped to the starting and maximum pressures possible in pressure cooking. Add the operating pressure of your pressure cooker to the air pressure at your elevation to look up how hot (and thus how quickly!) your foods will cook.
Pros
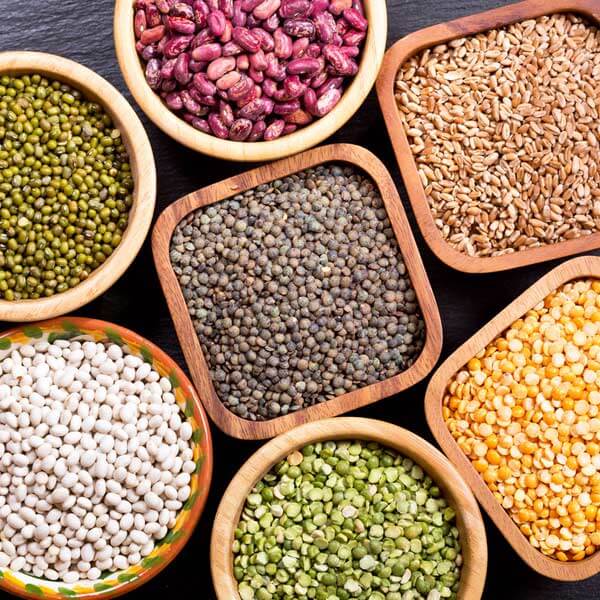
• Speed! Raising the boiling point of water from 212°F / 100°C to 248°F / 120°F roughly quadruples how quickly culinary reactions can occur, cutting cooking times by ~60–70% (it takes some time to heat up the food; otherwise, it’d be closer to 75%). Pressure cookers are fantastic for cooking slow-cooking grains and legumes (rice and lentils in 5–8 minutes instead of 30), beans (30 minutes for dry, unsoaked beans to be ready to serve), and higher-collagen meats (ribs, pot roast, and pulled pork can all be cooked in under an hour are deliciously easy).
• Electric units are extremely energy efficient, meaning they’re great for summer cooking where you want something that’s normally slow-braised for hours—say, pulled pork—but don’t want to adds lots of heat to your kitchen.
Cons
• You won’t be able to poke at food while it cooks to adjust seasoning or check if it’s done. What goes in the pot at the start is what you’re going to get at the end, as when baking a cake. If you’re an intuitive cook, winging it as you go, treat pressure cooking as a way of cooking one ingredient that you’ll then use as a component in your meal.
• With the faster rate of reactions, overcooking will happen much more quickly. It’s better to slightly undercook something and continue cooking it “off pressure.” Take notes on cooking times on your recipes. (Use the low-pressure setting on vegetables to avoid overcooking.) Different pressure cookers will run at slightly different pressures, so treat times for recipes as starting points and take notes.
• Pressure cookers rely on boiling water or steam for transmitting heat—it’s a wet cooking method—and trap and condense most of the moisture, making it hard to reduce sauces. You may need to reduce the liquids after cooking. On the flip side, don’t skimp on the liquid: make sure that you have at least a cup or two of water in the unit; otherwise, there won’t be anything to turn into steam and you’ll end up burning the bottom of whatever you’re cooking.
Tips and tricks
• If you want to adapt other recipes to a pressure cooker, think about things that normally cook via steaming, braising, or any wet cooking method, and try cooking for a third of the suggested time. Make sure not to fill the cooker more than two- thirds full; some ingredients will expand as they cook, and blocking the release valve is bad. If using ingredients that foam while cooking — applesauce, barley, oatmeal, pasta — don’t fill the cooker more than one-third full. Be aware that dairy curdles under pressure, so add any dairy ingredients after pressure cooking.
• If you have a stovetop unit, you can rinse it under cool tap water to cool it down quickly after cooking; this is useful for quick-cooking foods like vegetables or polenta where the residual heat would continue cooking them.
• Many electric pressure cookers operate at 12 psi (830 hPa) instead of 15 psi (1,034 hPa), meaning cooking times for recipes based on the slightly higher pressure may need to be extended by 15–20%. Check the manual for the operating pressure, not the rated air pressure—manufacturers tend to list the maximum pressures their units reach and bury the true pressures at which they cook.
• Steam vegetables and artichokes using a metal steaming tray to raise them above the water level. You can also cook small quantities of food in a small glass or metal bowl this way—just remember to pour a cup or two of water into the pressure cooker! Don’t use plastic containers in a pressure cooker; they’ll melt.
• Pressure cookers are great for making stock. Save bones from meals in a container in the freezer. Once the container is full, transfer the contents to the pressure cooker, cover them with water, and cook for 30 minutes. Cool and strain the liquid.
• Try using your pressure cooker to render tallow or lard: toss chopped-up fatty meats into a jar, cover them with water, add a cup of water to the pressure cooker, and render for about 2 hours. Let the fat cool to a safe-to-handle temperature and pour through a strainer.
Indian Moong Dal Khichdi
Ingredients
- 2 tablespoons cooking oil, butter, olive oil, ghee, or coconut oil
- 1 medium red onion, chopped
- 1 tablespoon coriander seeds, whole, or ground
- 1 tablespoon turmeric powder
- 1/2 teaspoon cayenne pepper
- 1/2 cup white basmati rice
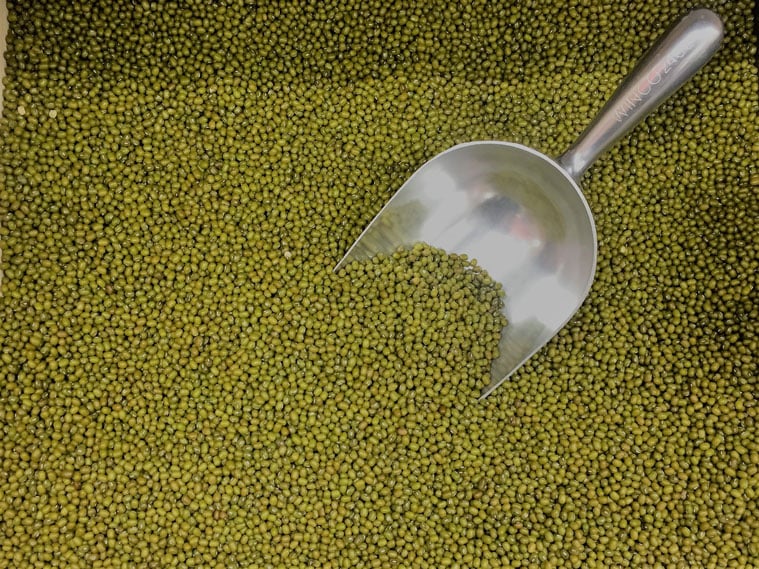
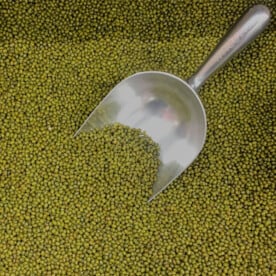
- 1 cup moong dal (split yellow mung beans), or red lentils
- 6-12 cloves garlic, peeled
- 1-2 tablespoons peeled, diced ginger root
- 1 lemon, juiced
- salt, to taste
- cilantro or parsley, for garnish
Instructions
- Sauté cooking oil, red onion, coriander seeds, turmeric powder, and cayenne pepper in a skillet, manual pressure cooker pan, or electric pressure cooker on sauté mode.
- Add rice, moong dal, garlic, and ginger root and stir to coat, and transfer to pressure cooker if necessary.
- Add 3 cups of water and close the pressure cooker. Cook under high pressure for about 5 minutes.
- Allow the mixture to cool, then open and stir it. Add juice from one lemon and salt to taste.
- Serve with cilantro or parsley.
Notes
Nutrition
 Cooking For Geeks: Real Science, Great Cooks, and Good Food, Second Edition
- 450 Pages of Answers to ‘How?’ and ‘Why?’ to Satisfy the Curious, Smart Geek
- Over 100 Recipes to Illustrate the Science
- 20+ Interviews with Chefs, Writers, and Researchers
A science and food geek, Jeff Potter is the author of Cooking for Geeks: Real Science, Great Cooks, and Good Food, which the Washington Post called “one of the most useful books on understanding cooking” (and is now in its second edition). He has appeared on NPR, The Today Show, CNN International, Food Network, and the Cooking Channel, and has spoken at science festivals both in the United States and overseas. Check out his website, Cooking For Geeks, or find him on Twitter and Facebook.


If you soak brown Basmati rice overnight, you can cook it as if it were white rice? To do the soak: 1. Wash the rice til water runs clear. 2. 1 cup rice calls for 3 cups water, 1 Tbsp apple cider vinegar. 3. be sure to put in a quart sized sprout jar. Let sit on counter overnight, 8 hrs.
Next day, rinse rice in a strainer. Put in rice cooker with 3 cups water, 2 Tbsp butter, 1 tsp sea salt. When finished, fluff with a fork. I love all of your recipes!
This is such a cool article! I just got a pressure cooker 2 weeks ago and I’m loving it so far. Great info, thanks!!!
Carrie, you should totally get Jeff’s book! You will LOVE. IT. 🙂