How to Can Your Own Tomatoes
Last Updated September 20, 2018 · First Published October 27, 2011

Over the course of the past several years, DPaul and I have steadily backed away from packaged foods, always striving to get closer to whole ingredients as a base. Consequently, it’s compelled us to do a lot more canning. Now, this is something of an unprocessed grey area in our kitchen, as I do use refined white sugar in my jams and pickles, but I figure at least this way I’m still managing the amount of it in our diet. A weak justification, perhaps, but it works for me. And anyway, we simply don’t eat that much jam (which is why we have a closet full of the stuff, mainly given to us by others.)
But perhaps the biggest departure from dependence on processed foods is with tomatoes. I’m half Italian, and so tomatoes are more to me than an ingredient; they’re as basic as water and air to my existence. (Mind you, we’re not eating so much pasta these days, either, but that’s another post.) So, for the last four years, we’ve been canning our own, and a lot of them at that. We’ve settled into a groove of canning 100 pounds each year. We’ve dabbled with different tomatoes, and this year chose to do 100% San Marzanos from Mariquita Farm. San Marzano and other plum-type tomatoes tend to have more flesh and less water, so you’ll get a better yield. Keep the heirlooms for salads and sandwiches.
Now, it’s true that off-the-shelf, canned tomatoes are as close to unprocessed as processed foods go. If you read the labels, it’s not hard to find purees or crushed tomatoes that contain nothing more than tomatoes and citric acid, and Muir Glen’s are even organic. However, most cans in America are lined with BPA, a known endocrine disruptor and possible carcinogen. (Standard canning lids also have BPA, but the contact between the lid and home-canned foods is minimal, so there’s negligible exposure.) But there’s another factor to consider: As outlined in Barry Estabrook’s Tomatoland![]() , commodity tomato production is one of the greatest agents of human slavery in America today. Migrant workers are lured over the border with the promise of work, only to find that the pay is insufficient to cover the debt they incur in the process. I prefer my tomatoes not to have the bitter aftertaste of human misery, thanks.
, commodity tomato production is one of the greatest agents of human slavery in America today. Migrant workers are lured over the border with the promise of work, only to find that the pay is insufficient to cover the debt they incur in the process. I prefer my tomatoes not to have the bitter aftertaste of human misery, thanks.
Here’s the thing with tomatoes: They are just at the threshhold of safe acidity levels for water bath canning. That means that depending on your tomato’s soil, variety, ripeness, and other factors, it may not be safe, and there’s no way to know. The most common way to work around this is to acidify them by adding two tablespoons of bottled lemon juice or 1/2 teaspoon of citric acid to each quart prior to canning. Citric acid in its pure form is almost certainly not in Unprocesed territory, and bottled lemon juice contains nasty preservatives like sodium benzoate, sodium sulfite and sodium metabisulfite. Luckily, it turns out that real lemons, so long as they’re Lisbons or Eurekas (not meyer), are sufficiently acidic, so squeeze on.
That said, I want my tomatoes to taste like tomatoes, not lemon, so we go the other route: Pressure canning. This way we can put nothing other than tomatoes in our jars, and have a blank canvas to work with then we crack them open down the line. The National Center for Home Food Preservation also recommends it for higher quality and better nutrition, so hooray for us. (But here’s what to do if you don’t have a pressure canner.)
When you’re taking on a canning project, it pays to think ahead and set up your workflow. For tomatoes, our process is core, score, blanch and shock, peel and seed, crush and cook, can.
Core
With a paring knife, carefully cut out a cone shape around the stem end of the tomato. For 100 pounds of tomatoes, you will do this approximately 10,000,000 times.

Score
Cut a small X in the opposite end of the tomato. This will help the skin to peel away after blanching.
Blanch and Shock
Have a large stockpot of water simmering, and fill a cooler with ice water. Carefully lower tomatoes into the water in batches, and simmer for about 30 seconds, or until the skin begins to wrinkle or peels away at the cored and scored ends. Remove the tomatoes to the ice water to stop cooking. Keep plenty of ice, like a few bags, on hand to replenish your shock bath.
Peel and Seed
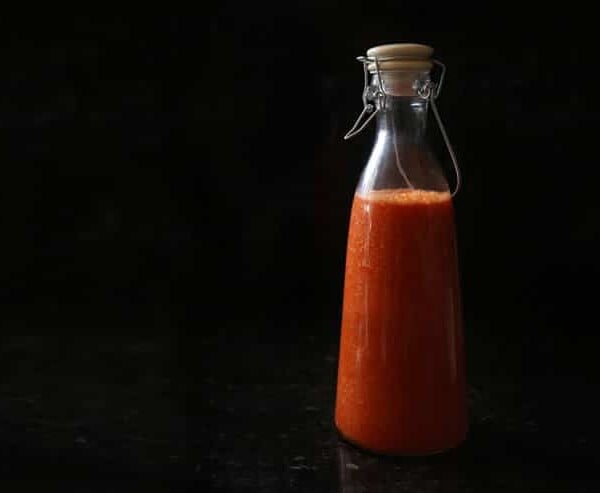
Place a colander or strainer over a large pot or roasting pan. Remove the tomatoes from the water. The skins should slide off easily. With your thumbs, pry open the segments of the tomatoes from the cored end and pull out the seeds. Leave the skins and seeds in the colander, and reserve the liquid in the pot. The skins and seeds can be composted, or reserved and blended into a paste. The tomato water can be canned separately and used as a base for soups, braises … and cocktails. Before long, your hands will look like this.

Crush and Cook
Crush the skinned, seeded tomatoes directly into a large stockpot, and place over a medium flame. Bring the tomatoes to a simmer, stirring to keep from scorching or sticking. The tomatoes will break down; feel free to use an immersion blender if you want a smoother puree.
Can and Process
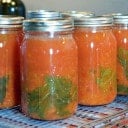
Have sterilized, hot jars waiting and have your pressure canner with the appropriate amount of water simmering. We typically run them through the dishwasher, timed to be done shortly before we’re ready to pack. Otherwise, keep your sterilized jars in a 220ºF oven. Ladle the hot tomatoes into hot jars (optional: add a sprig of basil). Run a clean chopstick or spatula around the periphery of the interior of the jars to release any trapped air. Wipe the rims with a clean, moist towel to ensure good contact with the lid. Add the lids and screw on the rings until just finger-tight.

Lower the jars into the canner. Apply the top of the canner and lock in place; remove the petcock from the valve. Crank up the heat on the stove to high. Once steam is venting consistently from the valve, set the timer for 10 minutes. Then, place the petcock on the valve and build pressure. Start backing the heat down when you reach 8 PSI; your goal is to hit and maintain just slightly above 11 PSI, and you don’t want to overshoot too much. As soon as the gauge reaches 11 PSI, set the timer for 15 minutes (at sea level; see recommendations for other elevations). If the pressure continues to build, gently lower the heat until it stabilizes. If the gauge ever dips below 11 PSI, though, bring it back up and start your timer over. You need 15 uninterrupted minutes at pressure.

Once the 15 minutes is up, turn off the heat. And wait. The canner must come down to normal pressure on its own; this will take about 30-45 minutes. When the pressure has dropped and the canner can be opened, remove the lid and let the jars stand for another 10 minutes. Then, removed them to a cooling rack, where they will bubble like lava lamps for another few hours.
After 12-24 hours, remove the rings and check the seals. The lid should be concave, and you should be able to lift the entire jar from the lid. If any lids did not seal, keep those jars in the refrigerator for more immediate use, or you can go through the entire process again for those. This year, we had about a 30% fail rate on lids, so I reprocessed almost a third of our tomatoes the following day.
Sure, it’s grueling, backbreaking, sweaty work, but one day’s effort pays off with a year’s worth of tomatoes.
In 2010, Sean Timberlake founded Punk Domestics, a curated site for the DIY food community. He is the Food Preservation Expert for About.com, and has also maintained the blog Hedonia since 2006. He lives in San Francisco with his husband, Realtor dpaul brown, and their hyperactive terrier, Reese. You can follow Punk Domestics on Twitter, Pinterest, and Facebook.


There is a much easier way. – 1 – simply blend the tomatoes, skin, core and all. Lots of nutrients in the skin, so don’t bother with the hastle of peeling. 2 – make sure you wipe the lid clean before putting the lid on and the ring, you should have a 99% success rate and not 70%. I can about 100-150 jars per yr and maybe have one fail. 3- you also don’t need a pressurized canner, you can get much simpler ones where once boiling, takes about 25-30 minutes and you can do about 7 jars at a time.
I forgot to add – I also have run the boiled tomatoes through the foley and just frozen the juice in bowls. Then pull it out and use for homemade sauce.
I have canned at home with my mom for year. We don’t precut or peel the tomatoes ourselves, but boil them up in a big kettle with a bit of water and run them through a canning foley (google that one!) to get off the skins and seeds. MUCH faster and easier. We always used a water bath to can them and have never had an issue. My mom had a pressure canner blow up on her once, so she is wary of them.
Home-canned foods are still processed. It’s just that you processed them yourself.
I don’t know how you get your garden to produce all the tomatoes at once for canning. Most people go for the less-life-intrusive route of canning once a week or so, as the garden produces. The whole canning process can happen while cooking/eating/cleaning up from dinner, and it doesn’t have to be grueling or backbreaking.
I purchase the tomatoes from a local farm.