Canning 101:The Basic Steps of Canning & Preserving
Last Updated June 28, 2020 · First Published October 15, 2012

I’m delighted to be joining in on October Unprocessed. Home canning is a terrific way to rid your pantry of commercially processed foods. In order to get you started, here’s a canning primer, complete with a bit of canning history, reasons for the current canning resurgence, and even a bit of troubleshooting, should your preserving project go awry.
A brief history of preserving.
People have been preserving food since our very first days. Early techniques included drying, smoking, fermentation, and packing in fat (a method we know these days as confit). Later came vinegar pickles, jams (often sealed with wax or more fat) and suspension in alcohol. Still, none of these approaches led to reliably preserved foods. There was always some risk of spoilage.
In the late 1700s, Napoleon Bonaparte was looking for a way to dependably preserve food for his troops and so offered a cash prize to anyone who could produce a better method. After much experimentation, a French cook named Nicolas Appert discovered the packing, heating, and sealing technique that is essentially what we use today.
Home canning has been popular in the United States since the late 1850s, when John L. Mason invented the first reusable jar with a screw-on lid. Canning technology was gradually improved and in 1915, Alexander H. Kerr innovated the two-part canning lid that we still use today.
The mechanics behind canning are fairly simple.
You fill a clean jar with prepared food, apply the flat lid and the threaded ring to the jar, and submerge the filled jar in boiling water for a prescribed amount of time (times vary widely, depending on what you’re canning). When you remove the hot jar from the water, the heat begins to escape, taking with it any air left in the jar. The escaping oxygen pulls the lid down, creating an airtight seal. A food-safe sealing compound embedded into the lid aids in the maintenance of the seal. High-acid food preserved in this manner will keep happily for at least a year.
In the last 60+ years, as food production became heavily industrialized and the full-service grocery store became the norm, home canning experienced a drastic drop-off in popularity. It went from being a seasonal necessity (how else would you preserve the bounty of your kitchen garden and fruit trees?) to a neglected art, still practiced in more rural areas, but nearly abandoned by city dwellers.
Thanks to the soft economy, concerns over industrial food safety and a desire among many of us to have more control about what’s in our food, home canning has once again become popular. However, for those who didn’t grow up watching their mothers or grandmothers, the process can be intimidating. Take heart! It’s not nearly as hard as you think.
Gather your tools.

To get started canning, take stock of your current kitchen supplies. You’ll want to gather some tongs, a wide-mouth funnel, a variety of measuring cups and, if you’re feeling really committed, a jar lifter (if you’re going to do a lot of canning, I do recommend this tool. It’s saved me from a number of hot water burns over the years).
A large, wide, non-reactive pot like an enameled Dutch oven is a good vessel for cooking preserves. A deep stockpot makes a good canning pot. Just pop a round rack or kitchen rag into the bottom of the pot to allow the water to circulate fully around the jars.
Here’s how you do the actual work of canning.
Find a recipe from a reliable source like the Ball website, the National Center for Home Food Preservation or a cookbook with tested recipes.
Gather your ingredients. Always work with the freshest produce you can find.

Remove lids and rings from jars.

Place the number of jars you’ll need on top of the rack in your stock pot. Fill pot (and jars) with water to cover, place a lid on the pot and bring it to a boil.

Put your lids in a small saucepan and bring them to the barest simmer on the back of the stove.

While the canning pot comes to a boil, prepare your product.

When your recipe is complete, remove the jars from the canning pot (pouring the water back into the pot as you remove the jars) and lay them out on a clean towel on your counter.
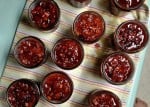
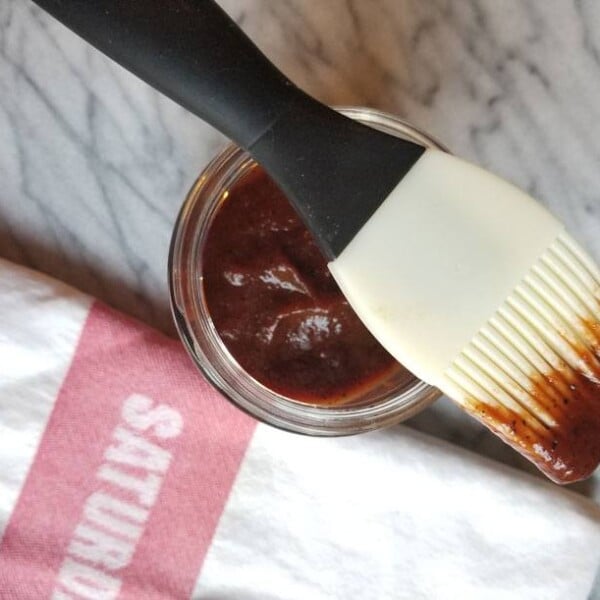
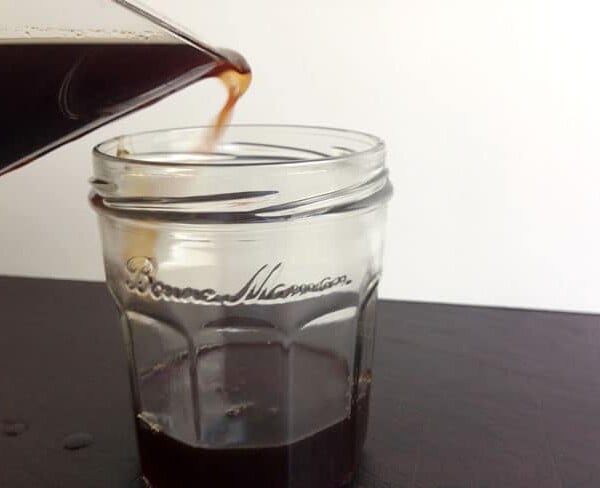
Carefully fill your jars with your product. Depending on the recipe, you’ll need to leave between ¼ and ½ an inch of headspace (that’s the room between the surface of the product and the top of the jar).

Wipe the rims of the jar with a clean, damp paper towel or the edge of a kitchen towel.
Apply lids and screw the bands on the jars to hold the lids down during processing.
Carefully lower the filled jars into the canning pot. You may need to remove some water as you put the jars in the pot. A heat-proof Pyrex measuring cup is the best tool for this job.

Once the pot has returned to a boil, start your timer. The length of the processing time will vary from recipe to recipe.
When your timer goes off, remove the jars from the water bath promptly. Place them back on the towel-lined countertop and let them cool.

The jar lids should begin to ping soon after they’ve been removed from the pot. The pinging is the sound of the seals being formed and the center of the lids will become concave as the vacuum seal takes hold.
After the jars have cooled to room temperature, remove the bands and check the seals. You do this by grasping the jar by the edge of the lid and gently lifting it an inch or two off the countertop. The lid should hold fast.

Once you’ve determined that your seals are good, you can store your jars in a cool, dark place (with the rings off, please) for up to a year.
Jars that don’t seal can be refrigerated and used first.

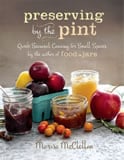 Marisa McClellan is a food writer, canning teacher, and dedicated farmers market shopper who lives in Center City, Philadelphia. She is the author of the popular books Food in Jars: Preserving in Small Batches Year-Round and Preserving by the Pint: Quick Seasonal Canning for Small Spaces. Find more of her jams, pickles, and preserves (all cooked up in her 80-square-foot kitchen) at foodinjars.com, and on Instagram, Twitter, and Facebook.


Why store with rings off?
To reduce the chance of jar breakage, you should not “remove the jars from the water bath promptly.” Instead, you should turn off the heat, remove the pot lid, and let them rest for 5 minutes before removing from the canner.
Also, please add to “processing time will vary from recipe to recipe” that processing time also increases with elevation. You should always follow the directions for your recipe, but a chart of common adjustments can be found here: http://www.freshpreserving.com/sites/default/files/AltitudeCharts.pdf
Thank you for sharing your knowledge about canning it’s greatly appreciated. I want to start canning, but always felt that it was more than I can handle. Being a city girl canning is not in my blood so I hope I don’t screw it up. I wish I grew up doing this/learning this skill. Thanks
The National Center for Home Food Preservation (website with recipes!) and the Ball Blue Book (great illustrations!) are excellent resources for novice and experienced home canners. Also, you can check with your local county extension office to see if they offer classes in canning and food preservation.
This might be a stupid question, but if I make my own nut butters, do I need to take any extra steps to preserve/can those jars? Or can I simply put them in a clean glass jar and be good to go?
I’ve never seen a recipe for home canning of nut butters. Food density is an issue for home canning, and I doubt you could can nut butters safely. Since nuts store well, it is best to make fresh to eat (probably 1-2 week supply).
Is it unsafe to reuse jam-jars (with vinegar proof lids)? Those screw top jars pictured are not readily available here (Spain).
The 2-piece lid is considered to be the only safe method of home canning in the US (you can’t reuse commercial jars). However, I know there are other jar types that are common in other countries. You still want to make sure you use tested recipes for the jar type you use.
Excellent instructions, thanks so much! I didn’t know about taking the ring off either. I also didn’t know that those fancy French or Italian wire-clamp jars were safe for canning, either.
These jars are only safe for high acid canning….. jams and jellies and fruit. Bascially, products that could cause little to no harm………
If you are canning low acid foods (all vegetables except tomatoes) you must follow the direction and use a pressure canner.
Also, the directions for the aformentioned jars direct you to remove the metal clamps after the jars have cooled for storage… that way you can tell if the jar is safe. However, I’ve seen pictures in many publications with the metal clamp still in place.
Thanks Heidi, that´s good to know, I´ve only done fruits and chutneys etc in the past anyway, so glad I´m not likely to have poisoned anyone.
Guess I´ll have to search out a source if I try any veggies. 🙂
Just wanted to note that tomatoes need to acidified when water bath canned (typ. lemon juice or vinegar), otherwise they need to be pressure canned; also, all sorts of pickles can be water bath canned!
Thanks, Marisa! I’ve never canned, but always wanted to learn how. This challenge has me inspired to try a small garden next year and knowing how to can produce will come in mighty handy!!
What a great topic for the week! I’ve been canning, dehydrating, and freezing produce from our garden for months, anywhere from a couple of hours a day to 8 or 10 hours a day. Things are just starting to slow down a bit and I’m so glad because I’m pretty tired. It is very satisfying, though, to see all that wonderful food in my pantry and freezer.
Just curious why you say to store with the rings (which I’m guessing is the screw on band?) off. Tnanks!
The rings might harbor a little bit of overflow (germs) or moisture (rust), they might get stuck in storage and ruin all of your hard work, or, worst of all, if the seal is not good, but the ring has been screwed on tightly, you could get spoilage that could possibly build up pressure until it explores in your pantry.
That makes sense – thanks for taking the time to explain that.
There is so much to learn and share here!
Make the greatest topping for any burger, Cowboy Candy!
http://www.sbcanning.com/2010/10/cowboy-candy-check-this-out.html
Super easy to make and delcious. Candied Jalapenos, how could you go wrong?
With all the effort that goes into canning why not do it right!? Anyone can buy (or download for free) the USDA Guide to home canning at the National Center for Home Food Preservation website. http://nchfp.uga.edu/publications/publications_usda.html
You will find a wealth of information to include:
1. Principles of Home Canning
2. Selecting, Preparing, and Canning Fruit and Fruit Products
3. Selecting, Preparing, and Canning Tomatoes and Tomato Products
4. Selecting, Preparing, and Canning Vegetables and Vegetable Products
5. Preparing and Canning Poultry, Red Meats, and Seafood
6. Preparing and Canning Fermented Food and Pickled Vegetables
7. Preparing and Canning Jams and Jellies
As well, the site has user friendly information about scientifically based methods of Freezing Food, Drying, Curing & Smoking Meat, Fermenting, and Pickling.
There is something on the site for EVERYONE!