Make Your Own Gourmet, Artisan Sauerkraut
Oct 19, 2012, Updated Sep 24, 2015

Sauerkraut is having a renaissance these days, and indie krautmongers are cropping up at farmers markets from Brooklyn to San Francisco. More and more of us are gaining an appreciation for the piquant tang that comes from lactofermented cabbage, and as for the dose of gut-friendly probiotics that comes with it, well, that’s just a bonus prize.
But the price tag on fancy farmers market kraut can also deliver a gut-punching dent in the wallet if you develop a habit of the stuff. Luckily, making your own kraut is easy, inexpensive and uses ingredients and equipment you can easily source, if not already on hand. The biggest commitment is time, and almost all of that is inactive.
To make a perfectly delicious batch of your own gourmet, artisan kraut, all you need is a big bowl, a quart-size mason jar, cabbage, sea salt, and patience. But there are a few ways you can kick it up a little.
Cabbage is the traditional base for kraut, but don’t feel like you have to stop there. Feel free to include any other crunchy vegetables you like: Carrots, radishes, turnips, what have you. Right now I’ve got a batch of green cabbage with fennel bulb, and it’s quite lovely indeed: Pale and crisp, with the subtle note of fennel backing up the lactic acid tang. But when a small red cabbage appeared in a CSA box, I knew what its fate would be as well.
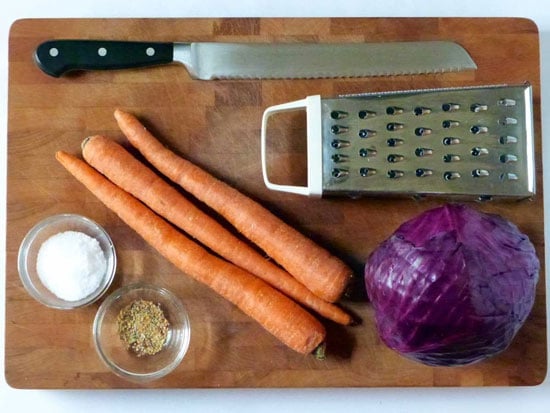
For this deep garnet kraut, I used:
1 small red cabbage, about 1 pound
3 large carrots, again about 1 pound
Slightly more than 1 tablespoon sea salt
1 teaspoon each yellow mustard seed and fennel seed
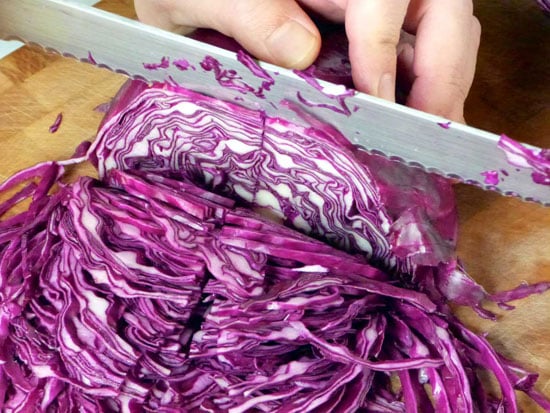
First, quarter and core your cabbage, and slice crosswise as thinly as you possibly can. Feel free to use a mandoline or food processor with slicing attachment for this if you like.
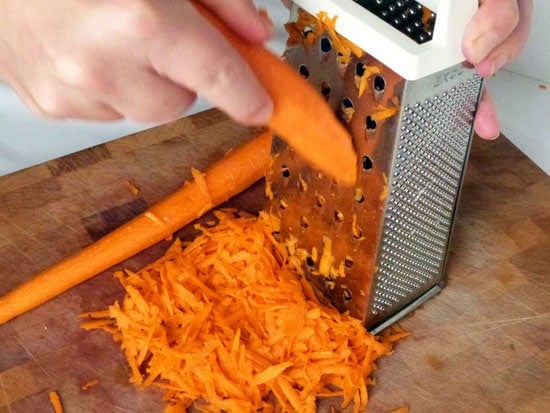
Grate your carrots, or whatever crispy veg you prefer. Again, the food pro can make short work of this, but I went old school with the box grater.
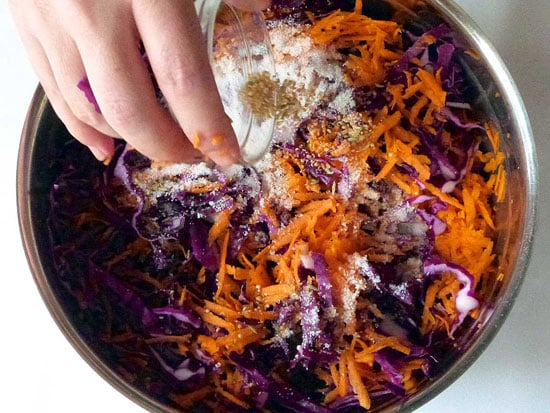
Combine the cabbage and carrots in a large bowl with the salt and spices. Feel free to get creative with the spicing here. Mustard seed is a classic, as is caraway. I happen to like fennel seed. If you went with 1-1/2 pounds of cabbage to ½ pound of carrots and some sliced jalapeños, you’d be making the Salvadoran curtido, which is also very nice. You can have fun with the flavorings, but just don’t waver too much on the proportions of vegetables to salt: A little over 1 tablespoon of sea salt for every two pounds of veg is just about right, and I’ll explain why in a bit.
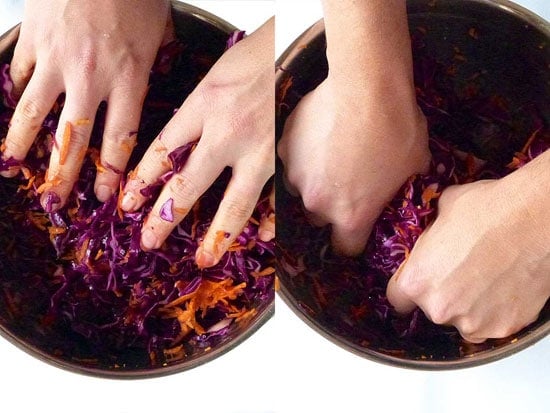
Toss all the ingredients in the bowl, using your hands not just to mix, but to gently crush the shredded vegetables. Do this until they start to release liquid, about five minutes.
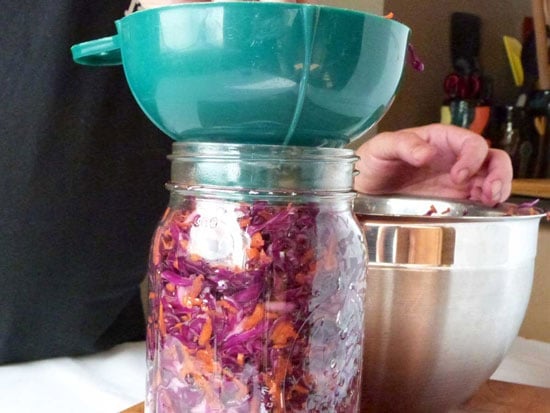
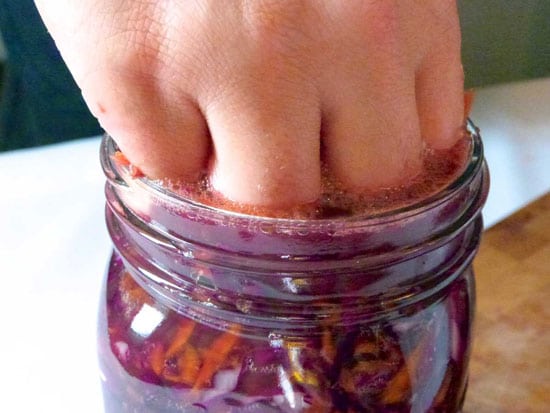
Pack the mixture into a meticulously clean quart-size mason jar. A canning funnel makes this a little easier, but is not strictly necessary. As you approach the top of the jar, use your hand or a wooden spoon to really compact down the mixture; juices will exude and rise.
You should have just enough to completely fill a quart jar, very tightly packed. Press down hard and allow as much liquid to rise as possible.
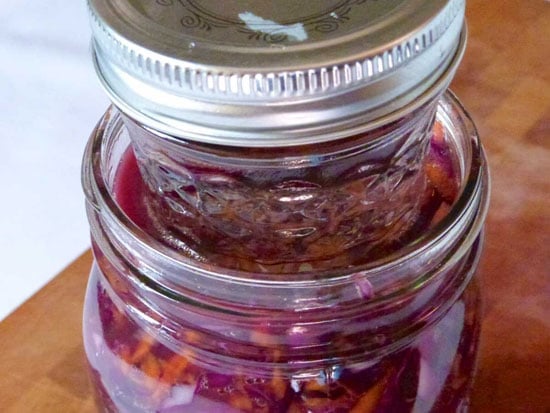
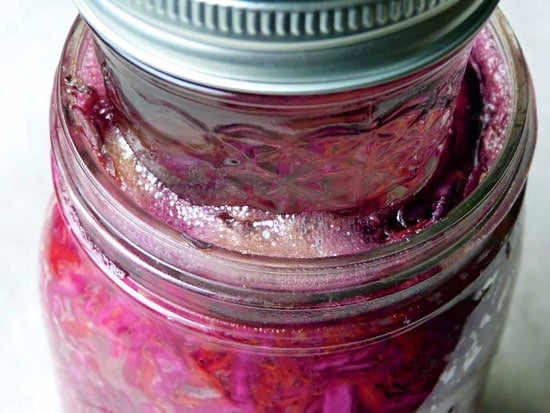
Add a small weight on top to ensure the kraut stays submerged in its juices. I use a smaller mason jar filled with water.
Loosely cover the jar with a clean towel or cheesecloth. Check it every day to make sure the kraut stays submerged; if it does not, press down to release more juices, and if necessary add a little water. One day in, you should see bubbles forming; by two days you may see foam, scum or even some mold. This is normal. Simply skim away any offending bits, and carry on.
This is the period where the magic happens. Fermenting foods for human consumption is all about tipping the balance of power in an always-ongoing battle between countless varieties of microbes that live among us, always, everywhere. If you simply left some shredded cabbage and carrots out, at best they would shrivel and dry, and at worst they would allow the development of harmful bacteria. But by raising the salinity of the mixture and keeping the solids submerged, you are giving our friend lactobacillus the upper hand. Lactobacillus in turn consumes sugars in the cabbage, a byproduct of which is that it produces lactic acid, and that newly more acidic environment is very, very unfriendly for a whole host of bad bugs.
Moreover, probiotic foods rich in lactobacillus are increasingly shown to have tremendous health benefits. Aside from being one of the more prominent players in our gut flora that simply aid in digestion, probiotic foods can help stave off everything from lactose intolerance to high cholesterol and even colon cancer.
Three days into the fermentation process, have a taste. It should be lightly sour, fragrant without being really stinky. At this point you get to make the judgment call on how far you want to take the ferment. With each passing day, the kraut will get more sour and pungent; it will also begin to break down the cell structure of the vegetables, and therefore make it softer. Personally, I tend to stop the process around day five, when it reaches a pleasant sourness, has not too much funk, and is still nice and crisp. But hey, don’t let me cramp your kraut style. Get your funk on.
Sealed and stored in the refrigerator, your gourmet, artisan kraut will last a couple of weeks. Refrigeration slows the fermentation process, but it doesn’t completely stop it, so be prepared for the flavor to continue to evolve.
How to enjoy your kraut? I have a scoop with breakfast, a little good morning gift for my gut. And I reach for it any time I want to add crunch and zing to things like tuna salad, beans or sandwiches. But really, more often than not, I simply enjoy a nice scoop of it as a mid-afternoon pick-me-up.




I have been wanting to make kraut. Thanks for the instructions.
I squished my green cabbage from the farmer’s market and carrots from the grocery store along with spices and 1+ TB of sea salt for at least 5 minutes and then packed into a regular mouth quart jar but there wasn’t very much liquid – maybe a couple of tablespoons. I really did use a fair amount of force as I was putting it in the jar. Now what? It’s certainly not submerged.
Off to google for help…
Hm, that’s unusual. I often end up with too much liquid produced. Sometimes if you let it stand a bit, the salt’s osmotic effect will draw out more liquid. In a pinch, though, just add some water to bring the level up.
This morning there was more liquid! Enough to submerge everything so I’m very happy about that.
So glad to hear it!
I have been making sauerkraut for years, even when we moved to SoCal. It’s usually my dad’s job, as his visits seem to coincide with the perfect timing for cabbage fermentation:) And we do it the old, traditional way with whole heads of cabbage, salt, and water. That way I can have it shredded or cut, or separate it leaf by leaf for Serbian stuffed cabbage, “sarma”.
Unfortunately, my new apartment does not have a patio, and fermenting the old way is too stinky to be done inside. So I am infinitely grateful to Sean and Andrew for showing me the way to enjoy my kraut. Looking forward to making a batch!
Wonderful! Hopefully working in small batches will bring you the happy medium of delicious homemade kraut and a stink-free house.
We get tons of cabbage from our CSA and I can never use it up fast enough (my husband won’t usually eat it). Can’t wait to try making my own kraut!
I’m in the process of fermenting my second-ever batch of sauerkraut, this time following the USDA recommendation of a 3-6 week fermenting time (http://nchfp.uga.edu/how/can_06/sauerkraut.html). I’ve seen a huge range in recommended fermenting times–from days to weeks. Is the difference just going to be flavor and texture if I ferment for longer than you recommend, or is there something else going on there from a science perspective? Either way, I’m going to try one of your quicker batches while I’m waiting for my slower one. 🙂
Definitely the longer you ferment, the stronger the flavor. Over time you’re producing more lactobacilli, which in turn are converting sugars to lactic acid and aroma-producing esters. But at the end of the day it’s a matter of taste rather than science.
I LOVE making kraut. I usually pull mine early though as my husband tends to like a more mildly pungent flavor.
Is the fermentation best done on the kitchen countertop at room temp? In the dark, cool basement? In the refrigerator? How much will it “aromatically enhance” its immediate environs?
Heh — well, I find it’s fine on the kitchen counter, out of direct sunlight. Fermentation operates best at room temp; if you did it in a cooler place, it would slow the process down considerably. Since I pull mine at about the five-day mark, the aroma is still pleasant. If you prefer your kraut more funky, you could move it to a more out of the way location.
I have done this with green cabbage and it rocks!
My favorite– red cabbage kraut! I will try the carrots and mustard seed variation. Thanks Sean!
Before she died, my grandmother told us how to make kraut “the old fashioned way,” which is very similar to this process but, hers involved a huge barrel and leftover cabbage leaves with a big rock on top. Thanks for sharing!
Rachel, that’s fascinating. I have a big crock that can be used in the same way, but I find the volume too great — I prefer to do kraut in small batches. But your grandmother’s method is definitely the more traditional way.
That is how I remember kraut being made in my family…we had a crock and a rock.